


Holiday crackers are very fun to pop, but even more fun to make! Using a bunch of old toilet rolls, some of Dad’s best (worst) jokes and this outrageously fun how-to from crafty creative Rachel Savage. And her little helpers.
You’ll need:
- Toilet roll tubes (at least one per cracker, plus two spares to roll each cracker up)
- Glue
- Paintbrush
- String or ribbon
- Scissors
- Cracker snaps (you can find these at craft or party stores)
- Paper (around A4 size)
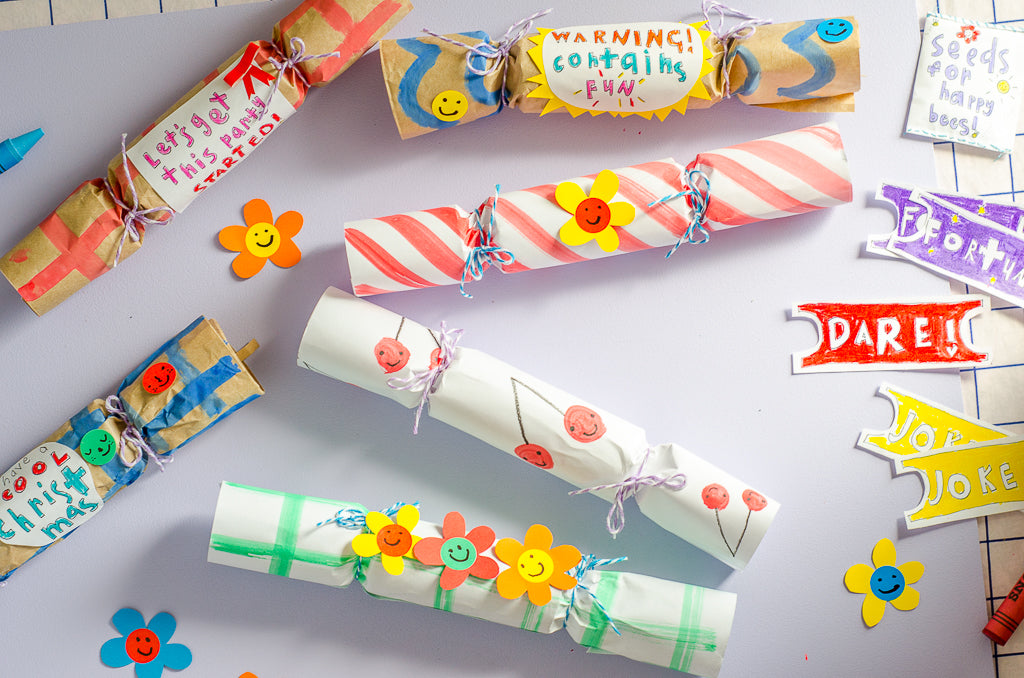
Tip: It’s a great idea to use old wrapping paper or recycle old magazine pages – even yesterday’s newspaper will work! We painted some plain white paper and old wrapping paper with colourful designs. - Treats to go inside your crackers!
Tip: We made JOKE, FORTUNE and DARE tokens. We also made little bags of ‘happy bee flower seeds’ to be planted in the garden as a little gift. (If you’d like to do the same, bees love cornflowers, cosmos, salvia, oregano, rudbeckia, to name a few!) Of course, you can always add your own homemade gifts or sweet treats. - Things to decorate crackers with!
Tip: We drew smiley faces on sticker dots to put on the crackers, we also used these faces on coloured card and cut out little petals to make flowers. Doodle pictures, or write funny messages to stick on your crackers that will have everyone cracking up!
How-to:

1. Clear some space on the bench or table – it’s not easy unleashing your creativity or rolling up Christmas crackers when you’re feeling a bit squished! Then, set out the toilet roll tubes, paper, glue, paintbrush, string, scissors, cracker snap, treats and decorative bits. They need to be nice and easy to grab.

2. Decision time! Choose the paper to cover your cracker in. Turn the paper pattern side down and set it in front of you in landscape orientation (so the longest side of the paper is closest to you).

3. Next, take one cracker snap and put it on the cracker paper. Put two dabs of glue on the cracker snap about halfway between the magic snap in the middle and each end of the snap. Make sure you don’t glue too close to the snap bit in the middle or your cracker won’t crack!

4. Turn the snap over and stick it down to your paper a few centimetres from the bottom edge and press it down well so it stays in place. Make sure it’s lined up nice and straight.

5. Grab three toilet roll tubes. (Your finished cracker will only have one toilet tube in the middle, but the other two are to help roll the cracker and keep your ends looking super slick and smart.) Slip your cracker treats inside one of the toilet rolls, then place this roll in the middle of the paper. Set the other 2 tubes on either side. (If you’re making crackers with younger kids who find it tricky holding the tubes in place, you may like to use a small piece of masking tape or washi tape to hold the toilet rolls together in a line.)

6. Now for the fun bit! Place the line of toilet rolls next to the glued cracker snap. Hold the toilet tubes like a rolling pin and start wrapping the paper over and roll, roll, roll! Keep the paper nice and tight as you go... just like making sushi!

7. Hold the cracker firmly so it doesn’t unravel, then spread some glue along the paper edge and stick it down really well.

8. Now, carefully twist one of the side toilet rolls and start to slide it out a little bit – don’t pull it out the whole way yet! (If you’ve got bits of tape holding the tubes together, you might have to give the tube an extra twist just to unstick it). Once you’ve slipped the toilet roll out of the cracker, feel for the edge of the middle toilet roll. Using your thumb and first finger, grip around and start squeezing the cracker paper so it starts crinkling and squishing in.

9. With one hand firmly holding around the middle tube, and the other holding the side tube, twist the outside tube so that the cracker necks sit neatly. Repeat this process with the other side.

10. Gently remove each of the 2 side toilet rolls, and tie the cracker necks up tight with string or ribbon. This will help hold the cracker together.

11. Add any decorations to the outside of your cracker, then get the party started!
Comments